| View previous topic :: View next topic |
| Author |
Message |
craig4wd

Joined: 28 Oct 2009
Posts: 8
|
 Posted: Wed Oct 28, 2009 2:02 am Post subject: Intel MCS-40 Prototype Development Set 1974-What's it worth? Posted: Wed Oct 28, 2009 2:02 am Post subject: Intel MCS-40 Prototype Development Set 1974-What's it worth? |
 |
|
Hi All,
What do you reckon this would be worth?
It's an Intel MCS-40 Prototype System Developers set.
It's complete in a bit of a torn box and has the following:
Set of Six Chips in original antistatic foam:
C4040 N4256 ES
C4289 N3982 ES
C4702A S1008 N5056
P4002 N1609
P4002-1 N4987
C4201 N5503 ES
MCS-40 User Manual for Logic Designers 1974
Data sheet: MCS-40 Prototype System A
Data sheet: 4201 System Clock Implementation Data (this is a photocopy that I believe was added into the kit by Intel)
Data sheet: 2702A Reprogrammable 2K PROM |
|
| Back to top |
|
 |
CPUShack

Joined: 16 Jun 2003
Posts: 34259
Location: State of Jefferson, USA
|
| Posted: Wed Oct 28, 2009 2:06 am Post subject: |
|
|
First off, check the foam and make sure its not eating the pins off those chips.
Old foam _ rare chips = VERY bad.
As for price I am going to say $2000+
Its hard to say on a piece like this as we have very little to compare it to.
Can you post better pics of the chips?
And is the datasheet for the 4702A labeled 2702?
_________________
New for 2025! The CPU Shack has a co-processor!
Visit The CPU Shack of microprocessor history and information. |
|
| Back to top |
|
|
craig4wd
Joined: 28 Oct 2009
Posts: 8
|
| Posted: Wed Oct 28, 2009 2:20 am Post subject: |
|
|
| Hi, here are some more pics. The data sheet doesn't says 2702. |
|
| Back to top |
|
|
smithy

Joined: 27 Apr 2008
Posts: 2906
Location: Sydney, Australia
|
| Posted: Wed Oct 28, 2009 3:44 am Post subject: |
|
|
Ahhh, looks like the pins on the 4040 & others have been corroded. Not good. Be careful if you try to remove the chips, as the legs can break off
Are you looking to sell this? |
|
| Back to top |
|
|
Chiefish
Joined: 23 Sep 2007
Posts: 2153
Location: Northwest N.J. U.S.A
|
| Posted: Wed Oct 28, 2009 4:30 am Post subject: |
|
|
Damn Black death, Other than that fact an awsome set of chips , wich I would guess worth alot. Jeese I wish they used better stuff to pack those older chips in.
_________________
"The only reason for time is so that everything doesn't happen at once." A.E. |
|
| Back to top |
|
|
kosmokrator

Joined: 03 Jul 2008
Posts: 4085
Location: Athens-GR
|
| Posted: Wed Oct 28, 2009 5:15 am Post subject: |
|
|
holly shit!!
even today exist this kit sit on some dexion?
nice stuff!and some are ES dont forget this.. |
|
| Back to top |
|
|
Windmiller

Joined: 24 Jun 2005
Posts: 1716
Location: Chapel Hill, NC
|
| Posted: Wed Oct 28, 2009 6:21 am Post subject: |
|
|
I would think that level of corrosion would severely reduce the price. At least for me.
The 4040 looks like it's legs are in pretty good shape. |
|
| Back to top |
|
|
hugo929

Joined: 27 Oct 2006
Posts: 6163
Location: China
|
|
| Back to top |
|
|
wepwawet

Joined: 18 Mar 2004
Posts: 3019
Location: Seligenstadt - Germany
|
| Posted: Wed Oct 28, 2009 8:12 am Post subject: |
|
|
It is an awesome box.
Definitely.
When you try to remove chips from the foam DO NOT START WITH THE C4040!
Normally the tinned chips go easier. And they are not that much corroded.
Start with them, then take the C4702 and the C4201 (take that as training). If they go easy out and do not have too much black glue (!) you might risk the C4289.
As absolutely last (if you do not decide to leave it where it is what might be the best choice) try the C4040.
To remove black death try acetone. First put the whole chip into a glass, after a while use a paintbrush to clean the pins.
If the golden pins lost their golden colour or shiver like a rainbow there is nothing you can do. Leave them as they are.
Good luck!
Puuh, I am envious!
_________________
You may use the photos I have posted here under CC BY-NC-SA license. |
|
| Back to top |
|
|
craig4wd
Joined: 28 Oct 2009
Posts: 8
|
| Posted: Wed Oct 28, 2009 10:56 pm Post subject: |
|
|
| Thanks for the tips. I think I'll cut the foam away from the outside with a razor blade and then see if I can slide the foam out from underneath. |
|
| Back to top |
|
|
CPUShack
Joined: 16 Jun 2003
Posts: 34259
Location: State of Jefferson, USA
|
|
| Back to top |
|
|
smithy
Joined: 27 Apr 2008
Posts: 2906
Location: Sydney, Australia
|
| Posted: Wed Oct 28, 2009 11:07 pm Post subject: |
|
|
I cut the foam with scissors around the chip, then soaked the whole chip with remaining foam in acetone. The foam disintegrates, then you can carefully try to remove the residual from the legs. I brushed with hydrochloric acid and it worked quite well - but be careful, one false touch of one of those legs and it will break off!
_________________
My former Intel collection:
www.smithschips.com.au |
|
| Back to top |
|
|
voschid
Joined: 05 Nov 2009
Posts: 4
|
| Posted: Thu Nov 05, 2009 4:36 am Post subject: |
|
|
Will you post pictures when you are done?
Or show a complete movie on youtube! |
|
| Back to top |
|
|
craig4wd
Joined: 28 Oct 2009
Posts: 8
|
| Posted: Wed Dec 02, 2009 4:06 am Post subject: Intel MCS-40 Prototype Development Set 1974-UPDATE |
|
|
So I've begun the extraction process - I see what you mean about old foam.
I need some tips to clean the pins properly and get the last bits of foam off now.
I cut the foam up so there was only one chip per piece. I cut as close as dared to the pins, about 5 mm away, so that the blade pressure wouldn't affect the pins. I used a cutting knife with a new blade.
Next as per wepawet's suggestion I soaked them in acetone. The foam didn't completely dissolve but it sort of brea up. After a good soak I used a a flat razor blade and carefully cut the foam away from the outside of the pins. It didn't really need cutting it sort of fell apart a bit.
After the outside of the pins were reasonably clear I then went carefully between each pin from the outside loosening the mushy foam that was on the inside. After I'd done both sides like this the foam in the middle of chip came out quite easily.
There was some residual foam left on the pins that th acetone didn't remove, it was quite plastic feeling and I didn't want to use to much force on the pins.
The 4702 had a broken pin, 4th from the right in the photo, there was no pressure on it as the foam came away the pin was broke, I've got the rest of the leg that's missing.
The 4280 was missing a half a pin, 2nd from the right in the photo, it wasn't in the foam.
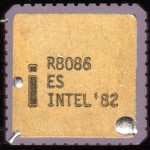
The 4040 came out pretty ok, pin 13 is bent but feels solid, I didn't want to risk bending it back. Pin 24 looks corroded.
Not sure the best wayto get residualy foam off and clean them the best way, I didn't want to experiment too much so any suggestions would be appreciated. |
|
| Back to top |
|
|
craig4wd
Joined: 28 Oct 2009
Posts: 8
|
| Posted: Wed Dec 02, 2009 4:10 am Post subject: More Pics |
|
|
| More pics.. |
|
| Back to top |
|
|
|

